


Echelon


Echelon
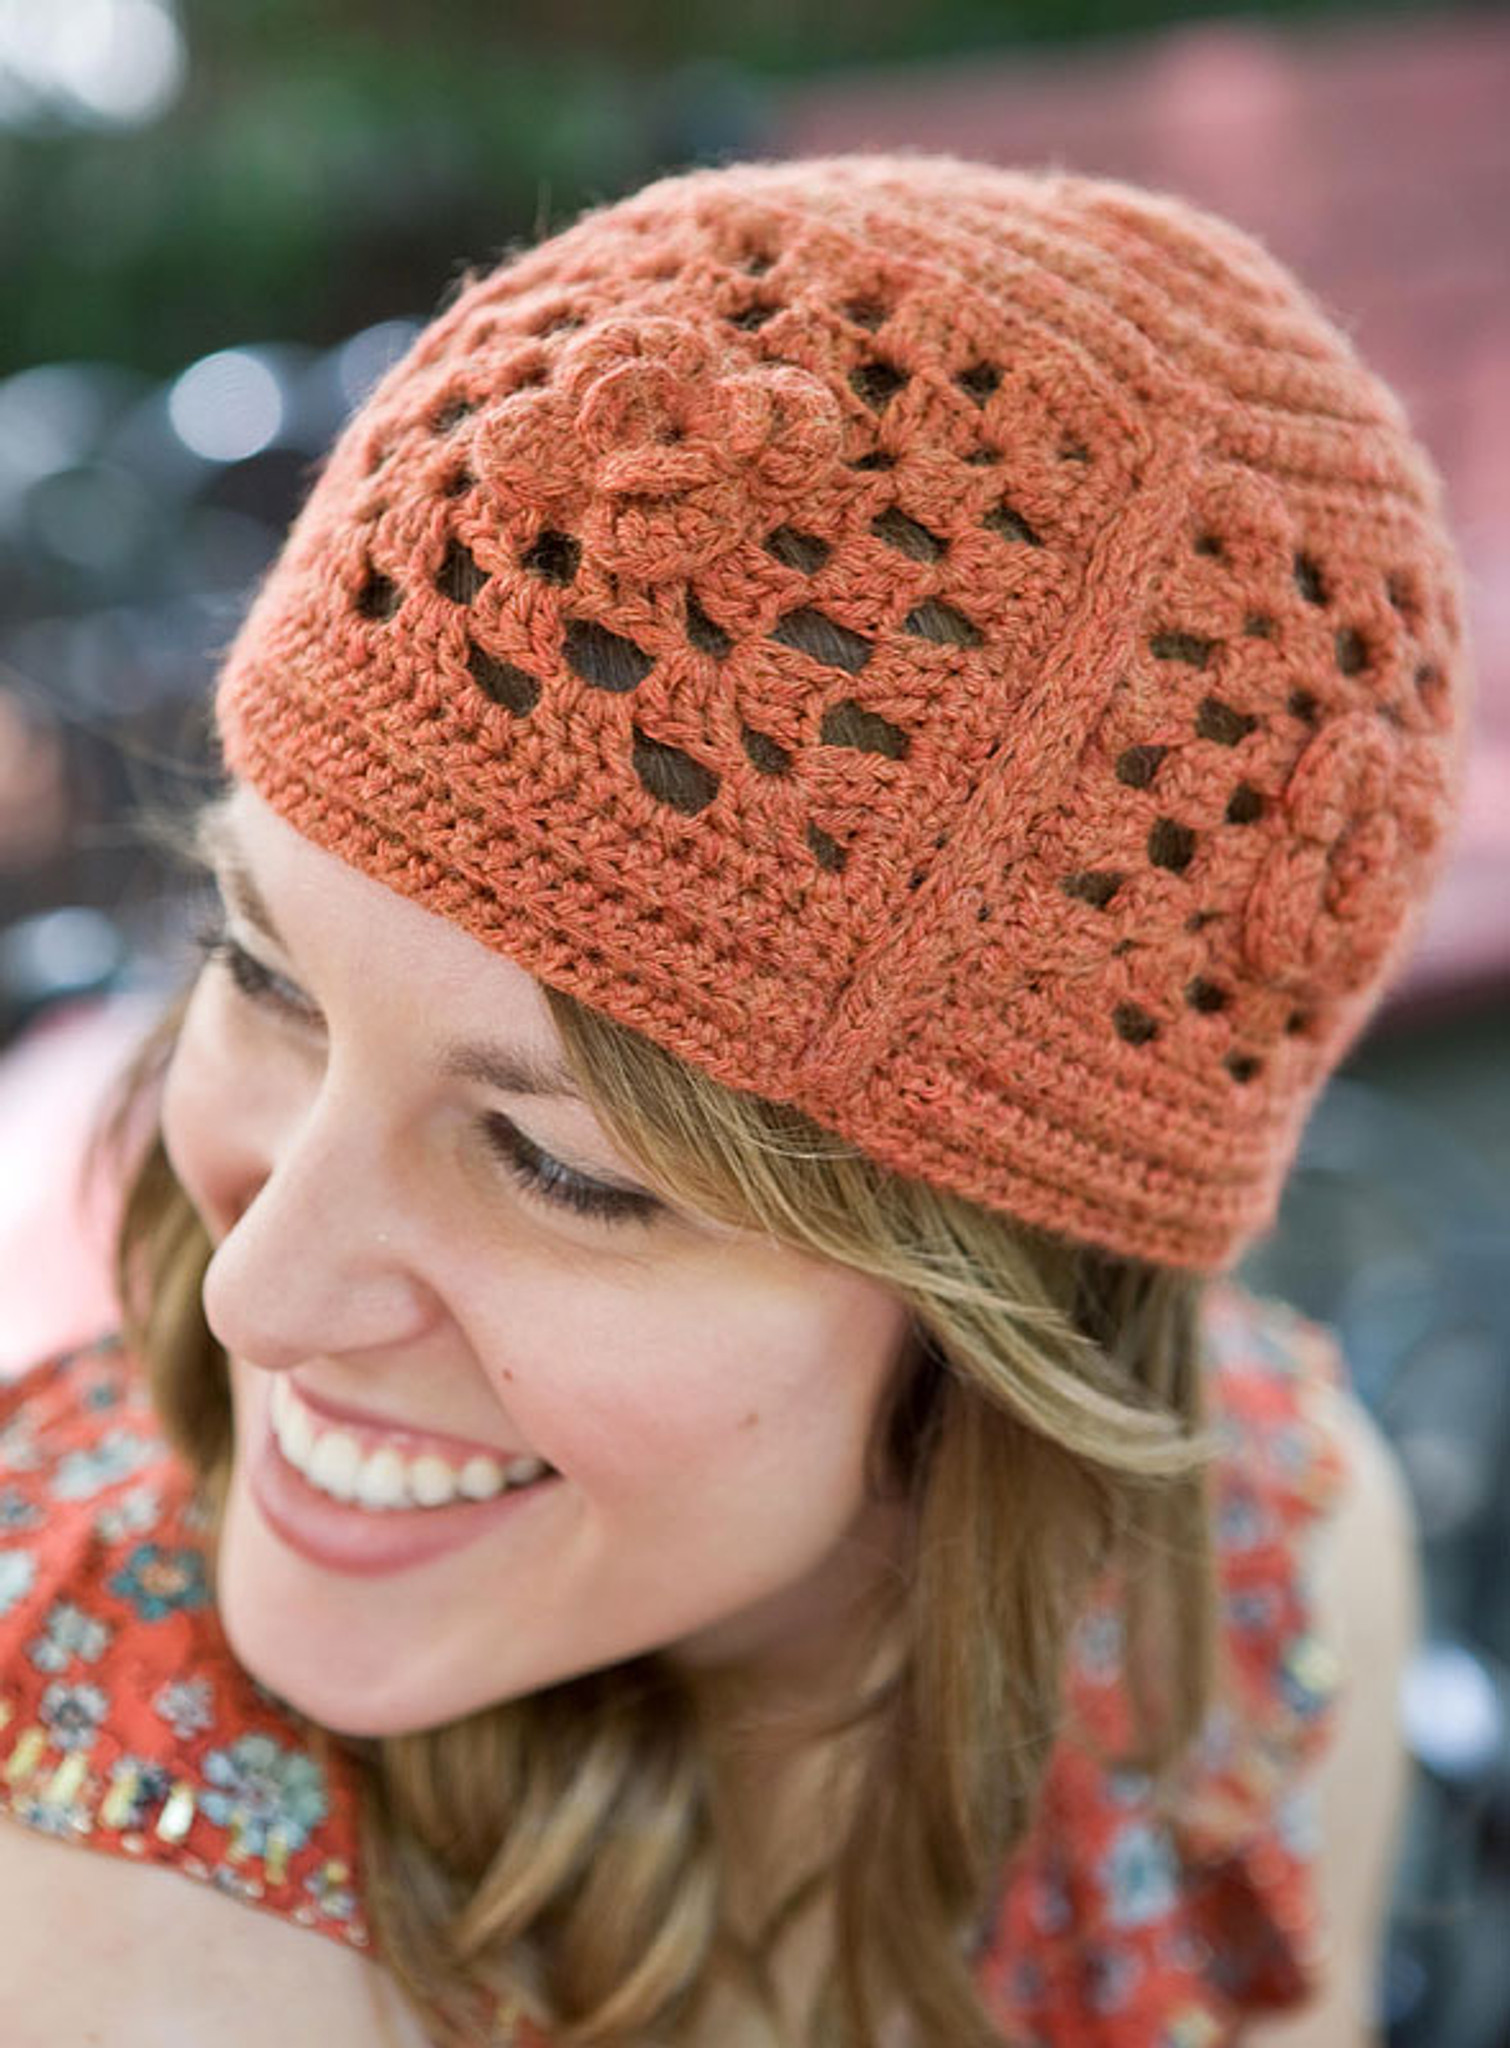
This happy hat is a modern riff on the classic crocheted granny square.
One size
Finished Measurements
Approximately 19” around x 7” high
Materials
1 Hank Berroco Vintage (100 grs), #5176 Pumpkin
Crochet hooks, sizes 3.50 mm (E-4) and 3.75 mm (F-5) OR SIZE TO OBTAIN GAUGE
Gauge
5 hdc’s = 1” with smaller hook
1 Middle Square = 4½” square
TO SAVE TIME, TAKE TIME TO CHECK GAUGE
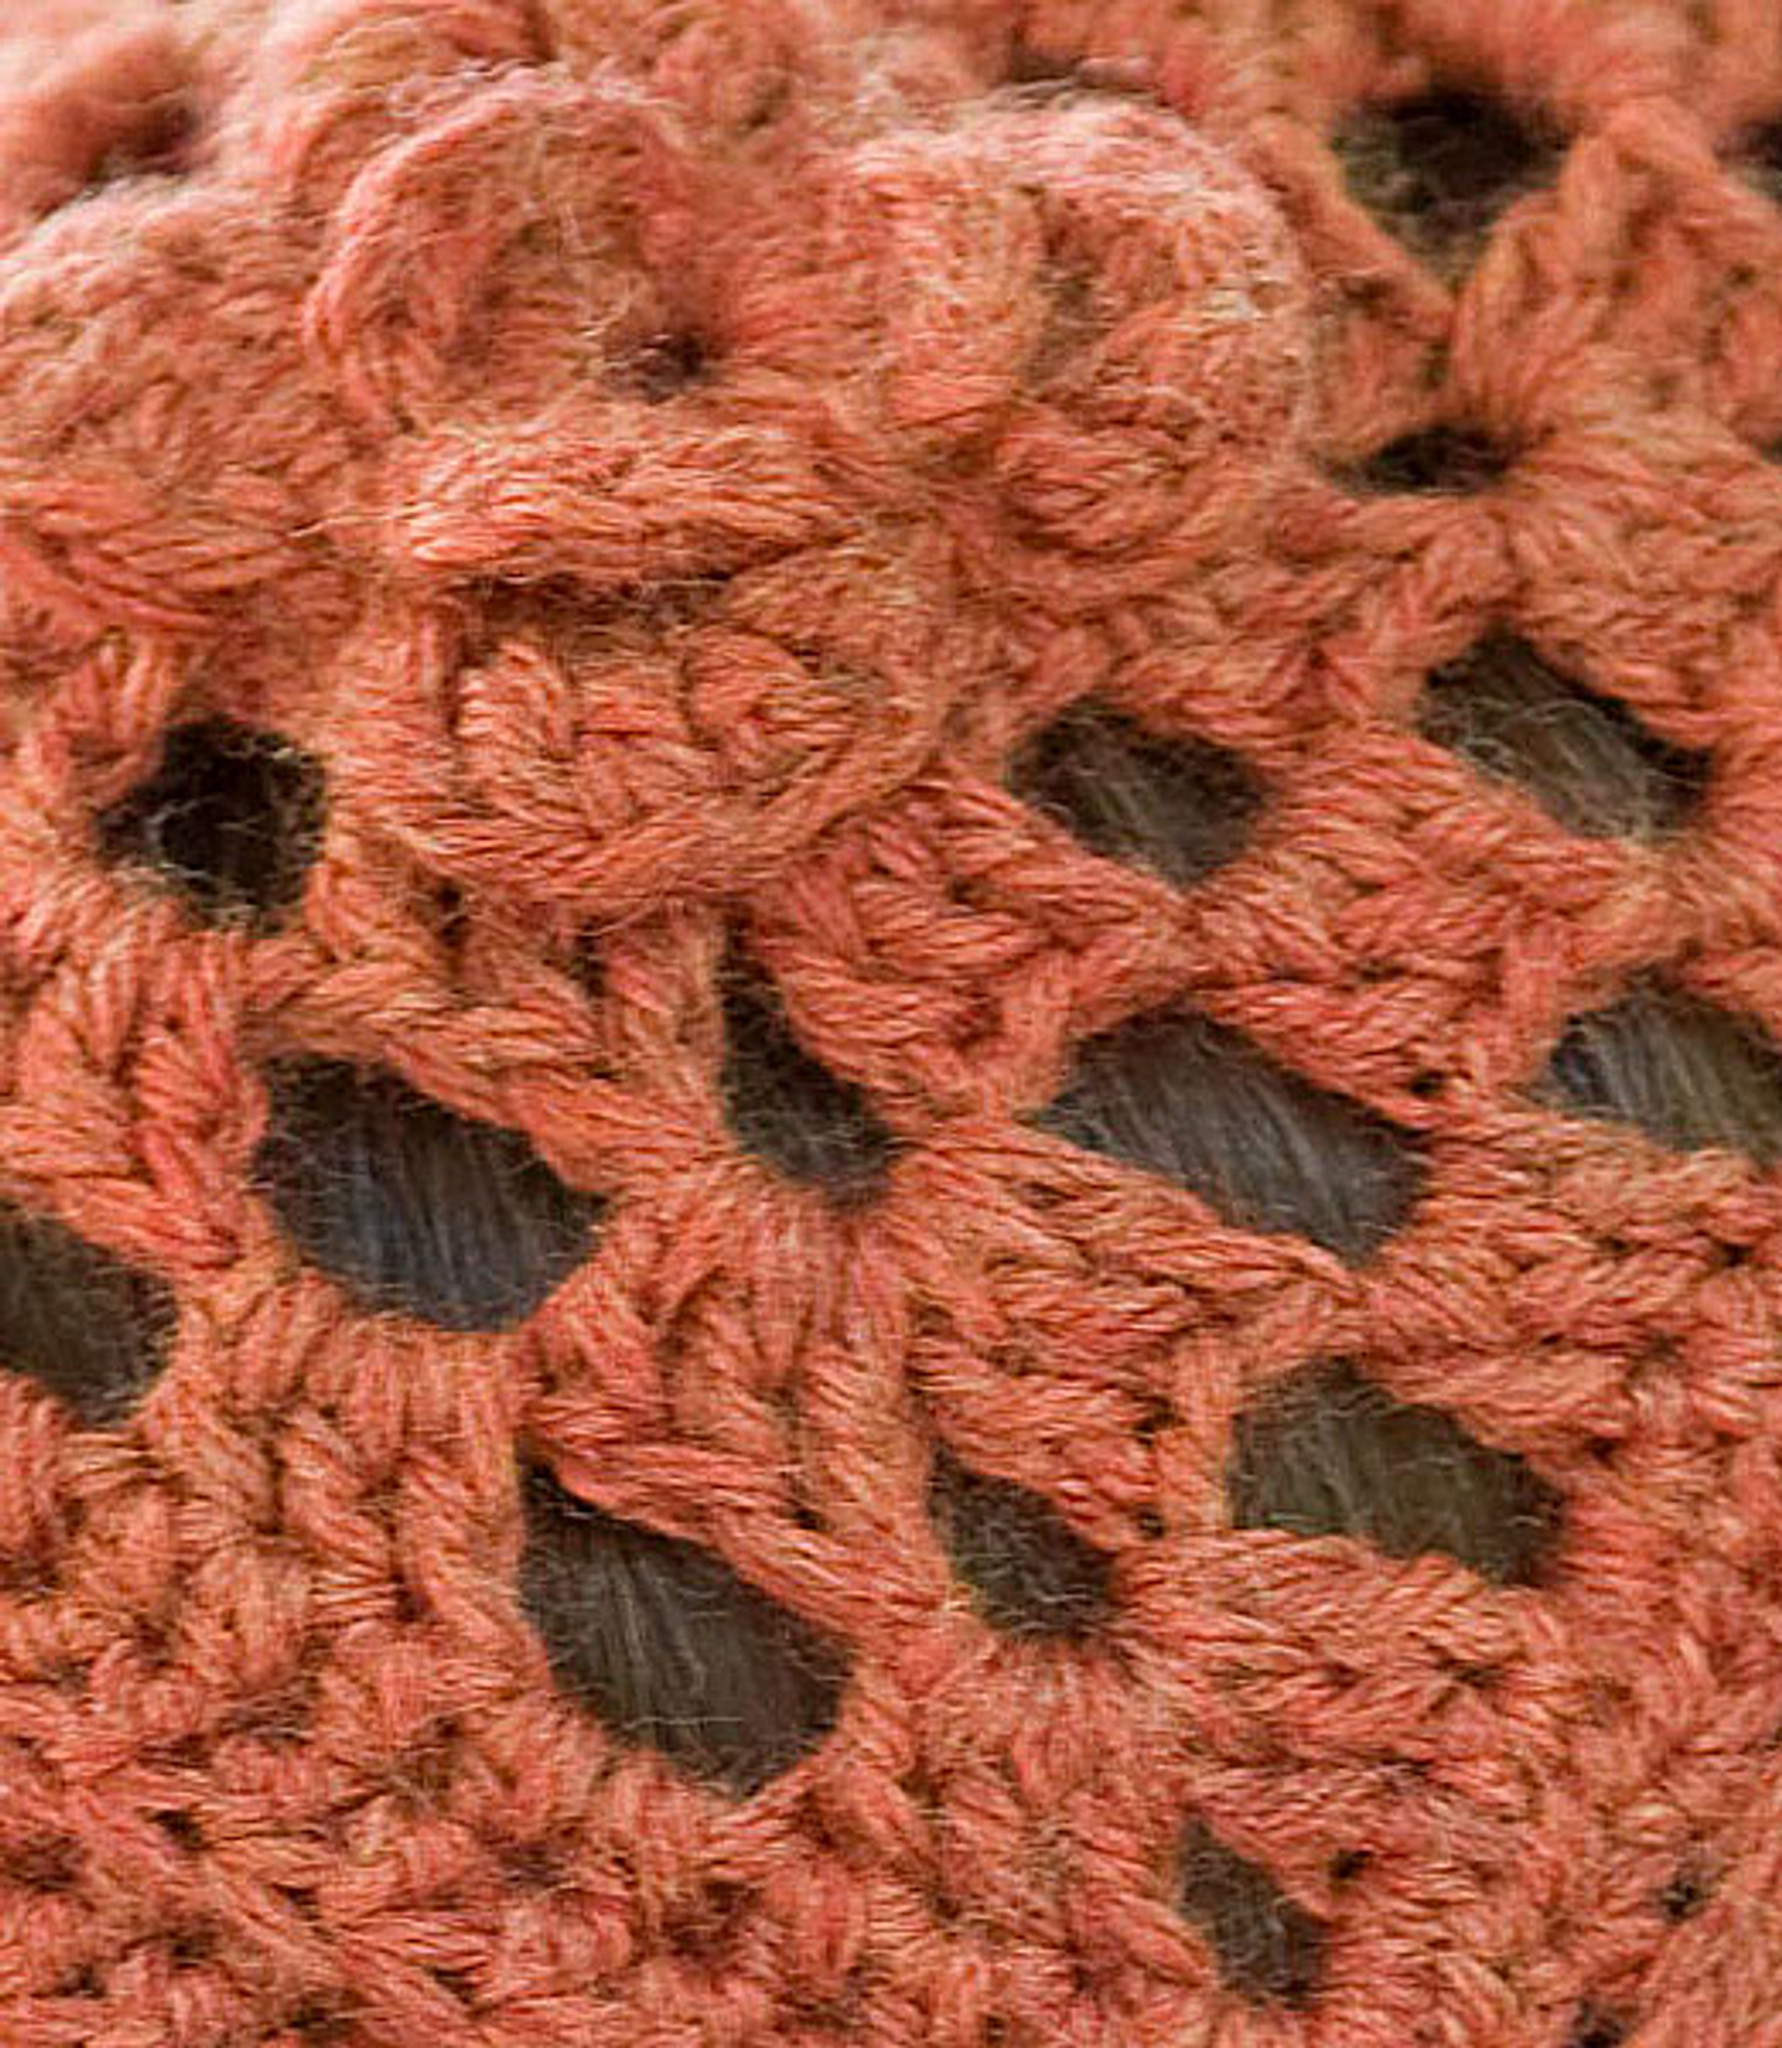
Middle Square (Make 4)
With larger crochet hook, ch 6, join with a sl st to form a ring.
Note: As you work Rnd 1, work over the tail of the yarn so you can pull in center of square when finished.
Rnd 1: * [Ch 2, 4 dc’s, sl st] into ring; rep from * twice more – 3 petals.
Rnd 2: Working behind petals, ch 6, sc in next sl st from previous rnd (between petals); * ch 4, sc in next sl st from previous rnd, rep from * once more – 1 ch-6 spaces and 2 ch-4 spaces.
Rnd 3: Working in ch-4 spaces of last rnd, [sc, 5 tr, sc, 5 tr, sc] all in first ch-6 space, [sc, 5 tr, sc] in each of remaining 2 ch-4 spaces, sl st between last petal and first – 4 petals made.
Rnd 4: Working behind flower petals, [ch 6, sl st between next 2 petals] 4 times – 4 ch-6 spaces.
Rnd 5: Change to smaller hook. Sl st into first ch-6 space. [ch 3 (counts as 1 dc), 2 dc’s, ch 3, 3 dc’s] all in same ch-6 space, * ch 3, [3 dc’s, ch 3, 3 dc’s] all in next ch-6 space, rep from * twice more, ch 3, sl st in top of beg ch-3 – 4 corners made.
Rnd 6: Ch 6 (counts as 1 dc and ch 3), [3 dc’s, ch 3, 3 dc’s] in next ch-3 (corner) space; * ch 3, 3 dc’s in next ch-3 space, ch 3, [3 dc’s, ch 3, 3 dc’s] in next ch-3 (corner) space, rep from * twice more, ch 3, 2 dc’s in last ch-3 space, sl st in 3rd ch of beg ch-6.
Rnd 7: [Sl st, ch 3 (counts as 1 dc), 2 dc’s] all in next ch-3 space; ch 3, [3 dc’s, ch 3, 3 dc’s] all in next ch-3 (corner) space; * [ch 3, 3 dc’s in next ch-3 space] twice; ch 3, [3 dc’s, ch 3, 3 dc’s] all in next ch-3 (corner) space; rep from * twice more, ch 3, 3 dc’s in next ch-3 space, ch 3, sl st in top of beg ch-3. Fasten off. Pull tail at center, closing hole.
BRIM (Worked along lower edge of each square)
With RS facing, using smaller hook, join yarn with a sl st in one corner ch-3 space of square.
Row 1: Ch 2, * hdc in each of the next 3 dc’s, 2 hdc’s in next ch-3 space, rep from * twice more, hdc in each of the next 3 dc’s hdc in corner ch-3 space, ch 2, turn.
Row 2: * Hdc in back loop of each hdc across, ch 2, turn.
Rows 3 – 6: Rep Row 2. On last row, do not turn. Fasten off.
Sides (Worked around 3 remaining sides of each square)
Turn square so that you are working along side edge of square. With WS facing, using smaller hook, join yarn with a sl st at outer edge of brim.
Row 1 (WS): Ch 2 (counts as 1 hdc), work 7 hdc’s evenly spaced across side edge of brim, * 2 hdc’s in next ch-3 space, hdc in each of the next 3 dc’s, rep from * 3 times more; 3 hdc’s in ch-3 corner space, ** hdc in each of the next 3 dc’s, 2 hdc’s in next ch-3 space, rep from ** 3 times more; 3 hdc’s in corner ch-3 space; rep from ** 4 times more, work 8 hdc’s evenly spaced across the other side edge of brim. Turn.
Row 2 (RS): Sl st in first hdc, ch 1, skip 1 hdc, * [sc in next hdc, ch 1, skip 1 hdc] 3 times, * [hdc in next hdc, ch 1, skip 1 hdc] 7 times, between *’s once more, sl st in next hdc; ch 2, hdc in back loop of the next 21 sts across the top (the lasst hdc on the top is the st in which you will beg the flat edged and pointed edge tops). Sl st in next hdc, ch 1, skip 1 hdc, rep between *’s; [hdc in next hdc, ch 1, skip 1 hdc] 7 times, rep between *’s once, sl st in last st. Fasten off and cut yarn, leaving 30” long tail to use when sewing squares together.
Note: Work Flat Edged Top on 2 squares and Pointed Edge Top on the other 2 squares. Work all sts TBL.
Flat Edged Top (Worked across top edge of 2 squares)
With WS facing, using smaller hook, join yarn with a sl st in corner hdc on top right-hand side of square.
Row 1: Ch 2, skip 1 hdc, hdc in each of the next 17 sts, skip 1 hdc, hdc in last hdc – 19 sts. Ch 2, turn.
Row 2: * Hdc in 4th st from hook and in each of the following sts to last 2 sts, skip 1 hdc, hdc in last hdc – 17 sts. Ch 2, turn. Rep Row 2 six times more (you will dec 2 sts on each row) – 5 sts remain. Fasten off.
Pointed Edge Top (Worked across top of remaining 2 squares)
Work same as flat Edged Top until row 3 has been completed – 15 sts. Ch 2, turn.
Row 4: Hdc in 4th st from hook, skip 1 hdc, hdc in each hdc to last 4 hdc’s, (skip 1 hdc, hdc in next hdc) twice – 11 sts. Ch 2, turn.
Row 5: Rep row 4 – 7 sts. Ch 2, turn.
Row 6: Hdc in 4th st from hook, hdc in each of the next 3 sts, skip 1 hdc, hdc in last hdc – 5 sts. Ch 2, turn.
Row 7: Hdc in 4th st from hook, skip 1 hdc, hdc in last hdc – 3 sts. Ch 2, turn.
Row 8: Hdc in 4th st from hook. Fasten off and cut yarn.
Finishing
Sew the 2 flat edged tops together across the top. Pin side edges of all squares together. Beginning at the brim, sew side edges together using stem stitch in the ch spaces formed in last row of side edging. When you reach the top, stitch through the top loops of the side edges up to the top of hat where all panels meet. Weave in all ends.
- Yarns Used:Vintage®
- Designer:Shelby Allaho
- Skill Level:Intermediate
- Craft:Crochet
- Project Type:Hats

Yarn Used

Berroco Vintage®